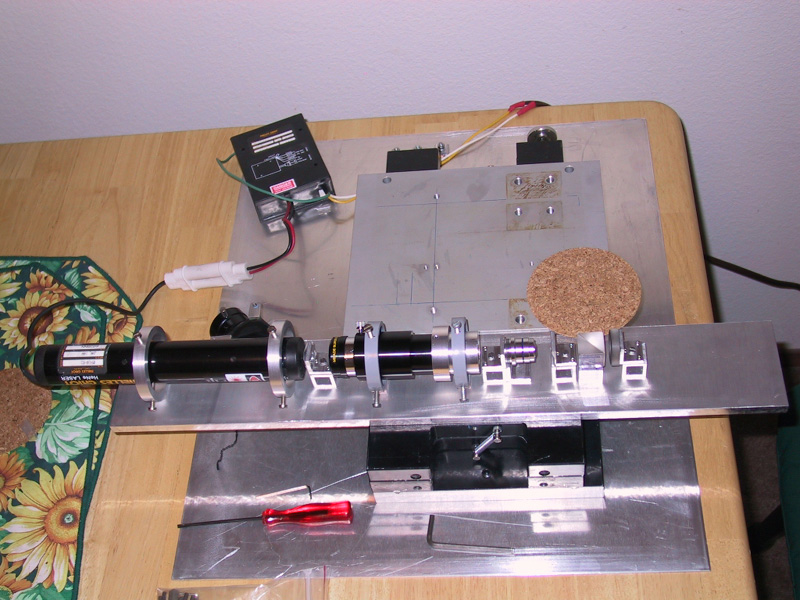
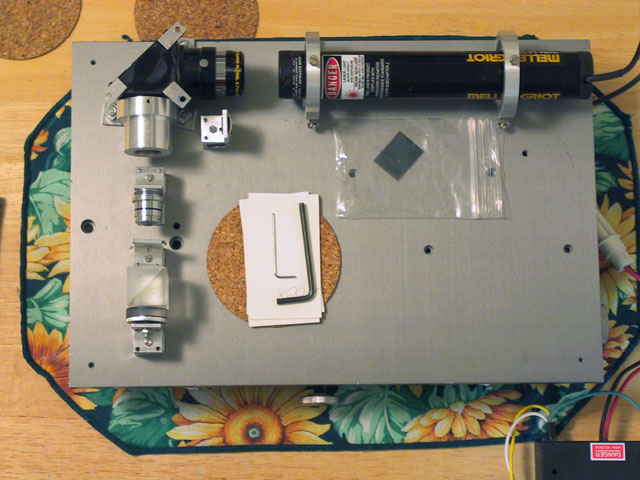
From left to right:
HeNE laser
ND2 filter to be used when taking pictures
Beam widening telescope
Microscope objective
Pinhole
Beam splitter cube
Reference element
The mirror under test is towards the bottom outside of the picture.
The camera is placed on the cork pad.
The whole setup is on the x-y tilt table
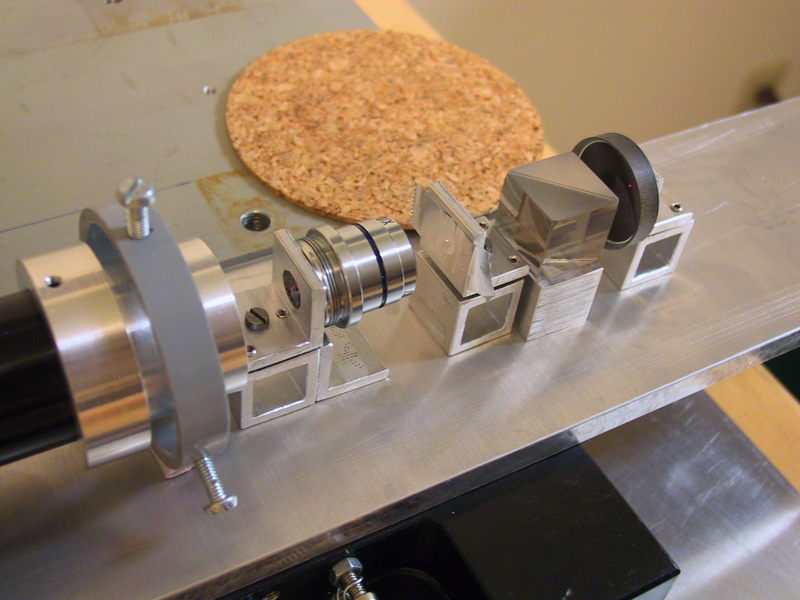
Here a closeup of the elements around the beam splitter cube.
Microscope objective
Pinhole
Beam splitter cube
Reference element
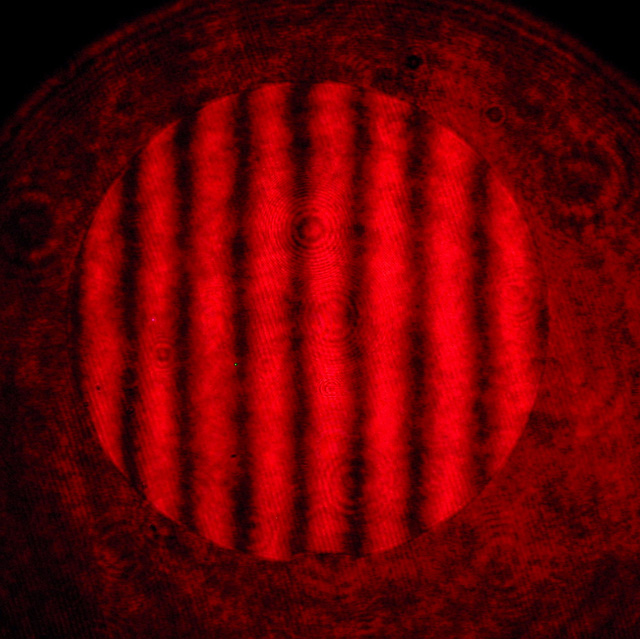
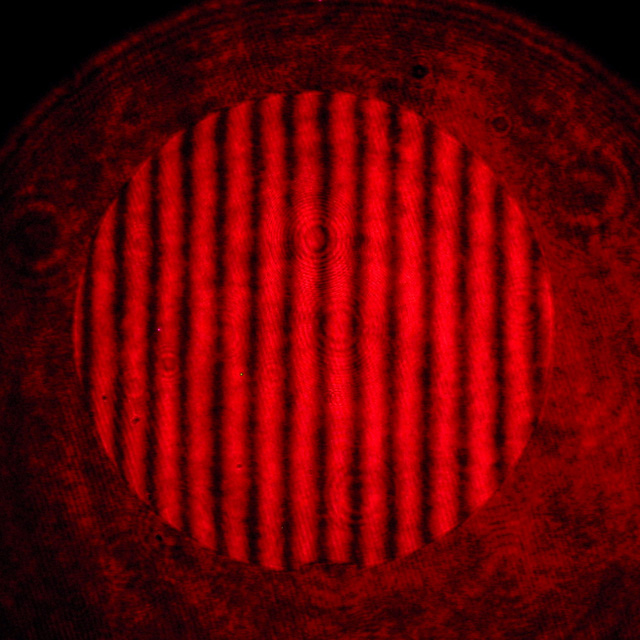
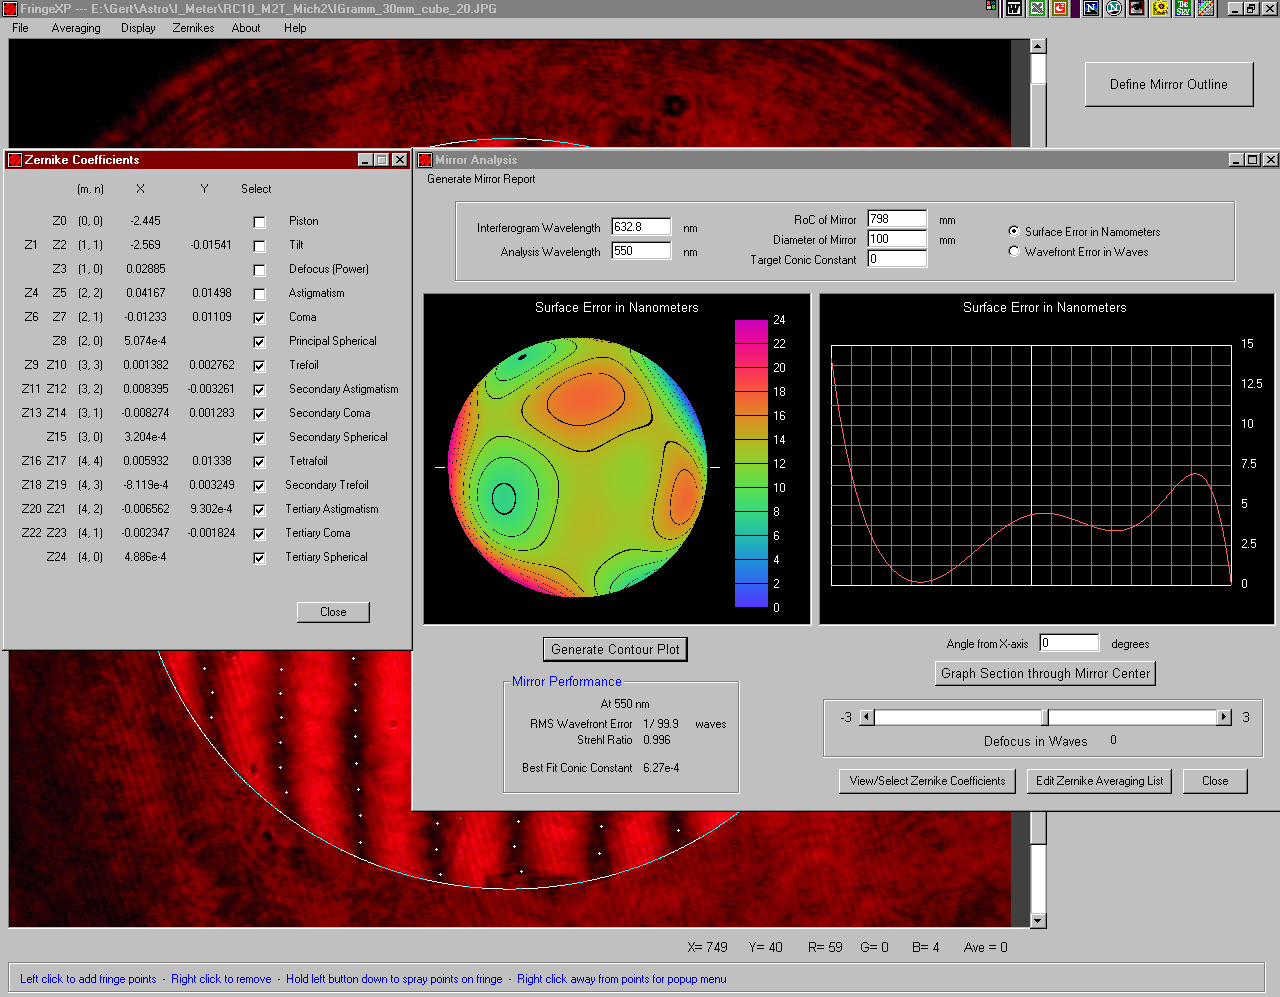
With the new beam splitter cube the interferograms are very rich in contrast. Here two examples of a 100mm mirror R=795mm.
Out of 4 interferograms Zernike coefficients were averaged and a surface plot generated.

There is still residual astigmatism. It needs to be researched if it is in the mirror or in the setup. Here a report without astigmatism.
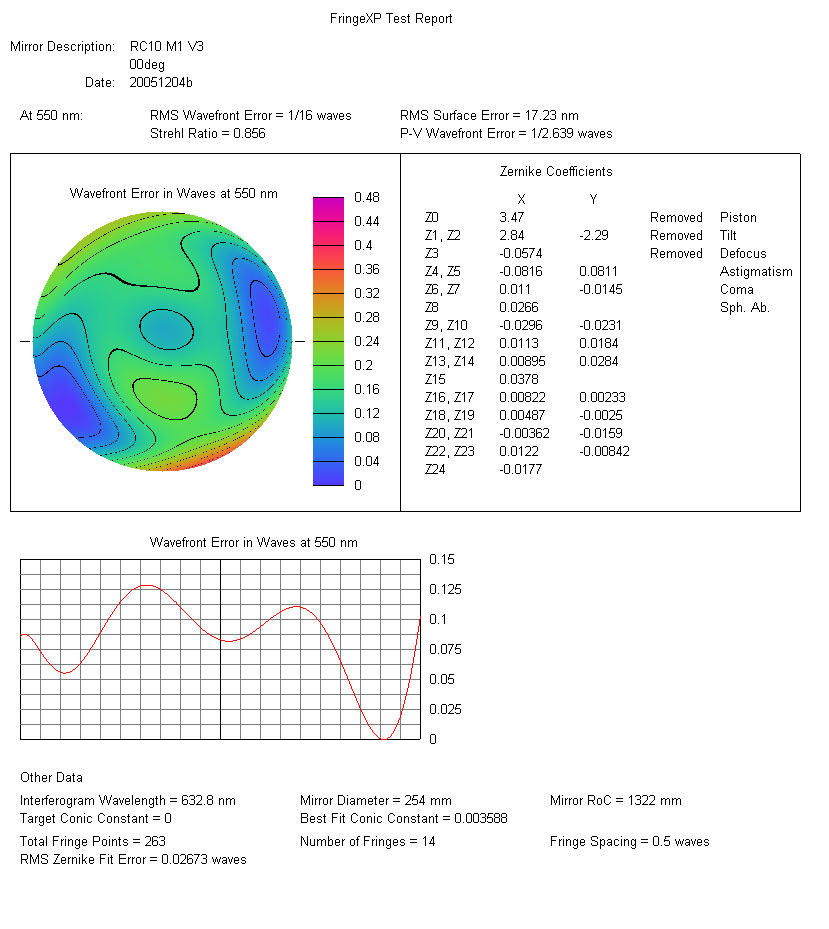
The Michelson setup was made more compact when a 90deg prism was introduced. Now the interferometer fits on one base board.
In a report from a pretty good mirror I see some residual coma and astigmatism. What can cause this in the Michelson setup?
Copyright images and processing Gert Gottschalk.
Copyright Bilder und Verarbeitung Gert Gottschalk.
Email : drgert1@yahoo.com
Back to my astronomy home page
Zurueck zur Astronomie Startseite